Android
Android Apps
development
flutter
flutter dart
flutter dependent drop down field
flutter development
flutter multilevel dependent drop down
iOS
ios apps
Create a dependent drop down field in Flutter

Icons made by Pixel perfect from www.flaticon.com
1. Start Visual Studio Code. Go to menu “View -> Command Palette” and select the “Flutter: New Project” option:

2. Create a folder called widgets inside the lib folder and
create a drop_down.dart file. This is where we are going to work:

3. Also, create a folder apps, and inside it create a
main_app.dart file:


4. Remove anything from the main.dart file, import the main_app.dart
file and call your main app:


5. So far so good right? It might look like a lot of
files/steps but this will be a structure of our app. Open the main_app.dart and
add a stateless widget that will return our main widget app:


6. Open the drop_down.dart and create our Main App widget.
We will create a form in our widget. Copy the following code, and as you can
see we are returning a SafeArea with a Form in the body:
7. Things are going well. You can even start the app right now:
7. Things are going well. You can even start the app right now:
8. Lets add an Padding class, and inside it, create a child
with a new Container specifying the width, and another column that will have
our widget as children:
9. For purposes of this example, lets add a text field inside the widget:
10. Now, before adding our dropdown fields, we will create our models, that we will need to populate our dependable dropdown fields. I will use in this example the Provinces and States of my home country, so that each time you select a State in the first dropdown field, the second one will only show the Provinces that belongs only to the State selected. Let’s create a Models folder, and inside it a localization_model.dart file:
Open that file, and create three classes:
- Localization (Main)
- States
- Provinces
Let’s build our Provinces Class first, like this:
And then our States Class like this:
You might be wondering why I’m using fromJson, and this is because I will be using a Json file to get all the values. Finally, build the Localization Class like this:
11. Create a folder outside of lib called “json”, there you will save the JSON file (Available in the Github repository). Also add the Assets in the pubspec.yaml
Since you are in the pubspec, add the HTTP library as dependency:
12. Now that we have everything ready (Models and Assets), go back to the drop_down.dart, there you need to import the following libraries and the model class:
14. Create two variables: statesList and provincesList as
List variables, and also a tempList where the filtered provinces will be saved
temporarily:
Tip: Add the _state and _province variables to save the selected options for each dropdown
Tip: Add the _state and _province variables to save the selected options for each dropdown
15. Create a Future function that will be called when we
need to get the contents of the JSON file:
16. Create another Future function that will use the previous function to get the contents of the JSON file, decode it, and make it an iterable list:
17. Override the initState method to initialize the _populateDropdown function:
18. Add a new dropdown field, where we will map the states that we got from the JSON and add each item to the dropdown list:
I am already adding the provinces filter in the onChanged call back, so that each time the user changes state, the correct provinces will be added to the other dropdown.
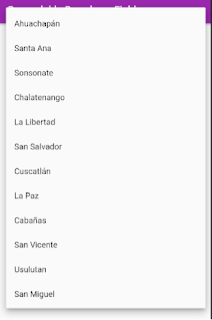
19. Look how is the app going right now:


20. Now, add the Provinces drop down field, using the tempList to
build its items:
And that’s it! You just created a dependable drop down field with Flutter!
And that’s it! You just created a dependable drop down field with Flutter!
Any questions or suggestions, just drop a comment!
You can get the code here: Dependable Drop Down Field with Flutter
Update:
By the way, the code has been updated. The DropDownFormField cannot be used for this specific purpose.


1 comment
How to Create Dropdown Button In Flutter, Dropdown Lists in Flutter
Post a Comment