clipbucket video gallery
development
elgg
elgg media gallery
photo gallery
picture gallery elgg
picture gallery wordpress
video gallery
wordpress media library
wordpress video gallery
Building a Video and Image Gallery with elgg
Icons made by Kiranshastry from www.flaticon.com
1. First, you must install elgg 2.3.x in your server. You
can read about how to install elgg here. (If you prefer to do a manual installation, you can download
elgg here)
2. Once you have elgg up and running, you have to install
the following plugins:
4. Log into elgg with your administrator account and open
the Administration Dashboard. Then go to menu "Configure -> Plugins":
6. Now let's upload some pictures. First, go back to the main site, and in the navigation menu click on Photos:
7. Click on Create New Album to either select an existing album or create a new one. For the purposes of this guide, I will create a new album:
8. Enter the title, descriptions, tags, and access for the new album:
9. The album has been created! Now, let's add some pictures by clicking on Upload photos to this album:
10. One of the main advantages of Tidypics is that it comes with an excellent tool to upload pictures, similar to what Flickr has. You can just drag and drop pictures and upload up to 10 photos at a time (that can be changed in the plugin's settings page):
11. After uploading the pictures, you can optionally add titles, tags, and descriptions to each picture:
12. As you can see, now we have an album with some pictures in it:
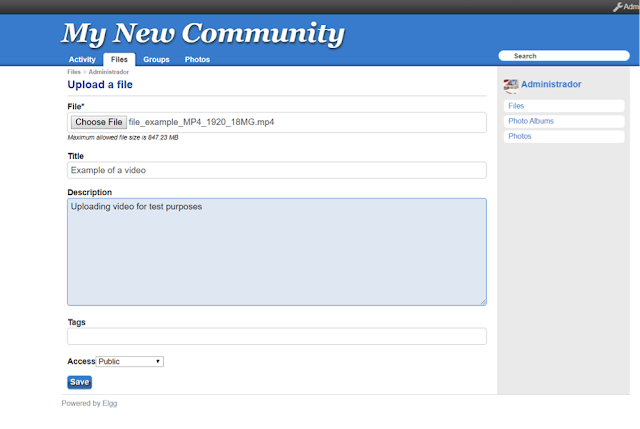
13. Let's add a video now! To upload videos, we will use the core Files plugin, which activates on install. To upload a video, in the navigation menu, click on Files:
14. In the upload for, choose a file, enter a title, description and tags. Click on save to upload the file:
15. After uploading the file, you will be redirected to a list with all the files uploaded:
16. Now you have a Video and Photo gallery!
17. It doesn't look appealing right? Even though the site "works", it actually looks like a project from late 2008, and such design will drive visitors away. However, no need to worry about that, since I developed a theme specifically for a site like this one. I integrated the TailWind CSS framework to port the GhostWind CSS template and I made it a theme for elgg. Get it from here:
Download here: https://github.com/rjcalifornia/ghost-theme
18. Install the theme as described in step 3, and then go to menu "Configure -> Plugins" and activate the theme:
19. And that's it! Now the site has a modern, clean, and responsive design:
20. And that's it, you just created a video and image gallery with elgg!
You can get the source code for the theme here: Ghost Theme for elgg


No comments
Post a Comment